Team Destroyer Racing
'72 Arctic Cat Puma 400


Home

75 Z 340 | 72 EXT 250 | Puma Oval Racer | 1973 Arctic Cat Puma 440 | Moto-Ski Bullet | '72 Arctic Cat Puma 400 | Duster 94c Super Tuning | Polishing Snowmobile Tunnels | Building a Slide Luber | Contact Me


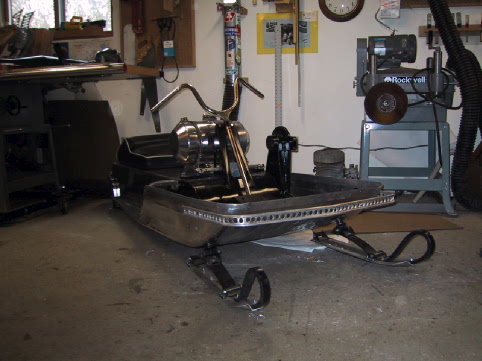
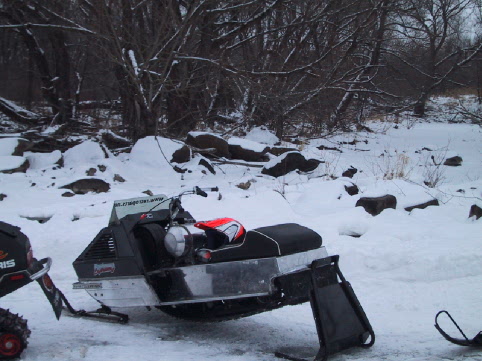
PHASE II-  the lil 400 has had some major upgrades to create a purpose built grass drag sled.  25 pounds of weight was shed from its last race, we have been playing with some different clutch combinations that are working 10 times better than what we had before.  it also looks a little different with lynx style handlebars and a smaller gas tank. i will have pictures shortly.  just more minor tweaks before the grass race season.  i put together a new track as well. we finally seemed to find the right length stingers and carb combination, but the clutching wasn't ever perfect.  there was a huge flat spot right after engagement, that should be taken care of now.  it should be a lot quicker than last season.

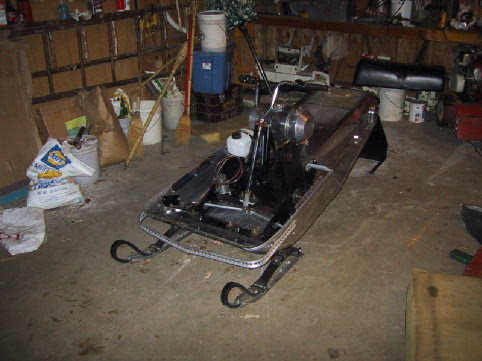
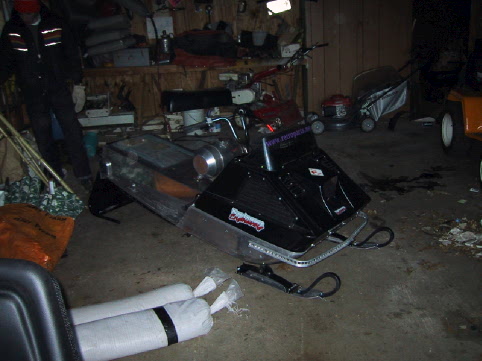
Brought back from the dead. This thing was pretty sad looking when we picked it up. it is basically a frankenstein of parts from a whole bunch of different sleds and aftermarket stuff.
 
As you can see from the pictures, it was quite dirty, and needed a lot of work to get it back into respectable condition.  It sat outside, so the hood was extremely faded, and the pan had a nice coat of green stuff inside. The first thing we did was take the pan off,  load everything up, take it to the car wash, and blast all the dirt, grease, and green stuff off.  The dirt was so deep that it required additional scraping to loosen it all up.

pmua1.jpg

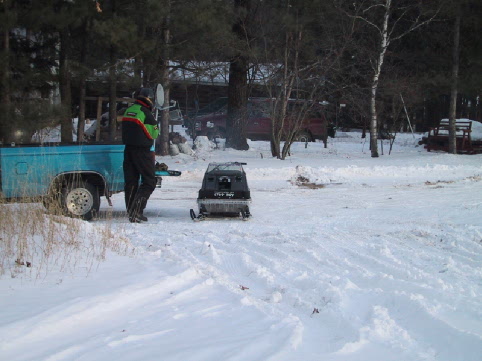
Fresh off the truck. Please note that the wahl bros. skis didn't come with it, they were just on to protect the pan from further damage. This sled actually was a 73 lynx I wankel, but with a few minor modifications it became a 72 puma.

pmua6.jpg

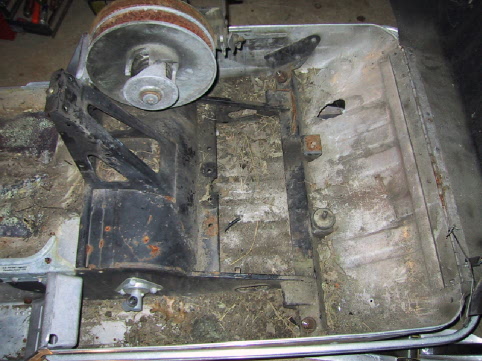
This is the inside of the pan before cleaning. I don't even think we needed to clean it!!!! :)

pmua2.jpg

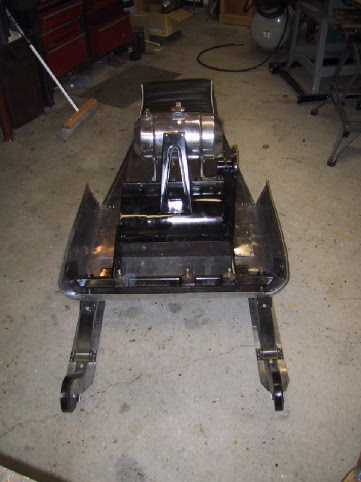
If you look in the last picture above, and this one you might notice that the original puma had a wankel bulkhead. Basically the only difference is the two motor mounts (wankel style) vs. the three (regular style) in the next picture. since we were taking the bulkhead out to paint it anyway. we just made a switch so we would have the right one.  starting to look like a puma again.


pmua3.jpg

Here is the hood after a Dupont overhaul. Don't be fooled, it was just sanded, primed and painted via a spray paint can. paint doesn't win races! lol.

pmua5.jpg

Here is what we have as of last night (dec. 16th). i spent a few hours chopping and drilling out the bumper. the entire bumper weighs less than the two pieces i cut off the back. definately an easy way to drop pounds. the gas tank is an 3 gallon eelco spun aluminum tank off of a sixies drag car. i spent a few extra $$$ and got all brass fittings for it to dress it up. compared to the stock 5 gallon steel tank, this thing is a feather.  The seat is an 80's wahl bros seat i bought from canada. it also weighs practically nothing. 
 

pmua7.jpg

All of the old cleats were taken off with a right angle grinder to make way for brand new cleats and 72 kalamazoo klaws.  the wavy cleats would allow the use of the klaws so we went with the straight replacements.

puma10.jpg

Here is the Track completely put back together. An air riveter made the job very fast and easy. looks like it is brand new!!!

puma12.jpg

Here is the first shot of the engine. a 400cc kawi with cdi ignition, cross over mod puma pipes, and dual 38mm flatslide carbs.the tank on the handlebars is for the slide luber.

puma13.jpg

Another shot of the motor. the cross over pipes are very awesome!

puma15.jpg

puma14.jpg

Another view of the drilled bumper. also check out where the headlight was. i cut it out to make an "air scoop." 

pm3.jpg

I whipped up a pretty fancy slide luber for the old cat suspension. the slides had a hole drilled and a hose barb super glued in. this luber is being run with an extra fuel pump, and not a washer pump.
 
The picture below shows what the lines on the suspension attach to. pretty neat set-up.

zx1.jpg


pmua9.jpg

The track practically jumped into the tunnel. very easy installation. the lines running out the front are for the luber. still have to drill the holes for them to enter the bottom of the bellpan. the track spins very very very easily. i have it tightened up just tight enough so the cogs in front don't jump and so the track can't jump the guides.  suspension is ready for some serious weight transfer.

pm2.jpg

The handlebars and hood have to be removed to get it out of the basement.   here is how it sits as of 1/10/02.


zx2.jpg

PICTURES OF THE FINSHED SLED.

pu1.jpg

pu2.jpg

Waiting in the pits before my run.

pu3.jpg

Here's a shot of me on my first practice run.  The "take off area" was shreaded from the open mod sleds, and i never could get a good jump.
 
We figured out the engagment is too low, and the helix was too shallow. it pulls really good now.

pu4.jpg

zx3.jpg

Here is a shot just before we took it out on our lake to do some clutch tuning. I think you can get a pretty good idea how low this thing is, in this pic. the belly pan is loooooooooowwwwww!

t-1.jpg